Organizing your book can be a challenge.
At least that’s how it’s been for me.
I wrote my first novel using MS Word… and lost whole scenes that later I had to rewrite. It was very discouraging and I thought there must be a better way to do this.
Then, during an online writing course, I learned about Scrivener. So many writers were raving about it, that I was curious about how it could help me.
I picked up the software and started writing my next book in Scrivener.
But I found it confusing and difficult to understand. I needed help to figure out how this program would help me write my story, in a simple, non-confusing way.
That’s when I discovered Learn Scrivener Fast. I was amazed at all the benefits this software really had. I didn’t realize you could actually self-publish your book directly from Scrivener to Amazon and Kobo(and other digital retailers). Suddenly writing and self-publishing a book, no longer meant fighting a war with technology. It was the first time I felt like I could really do this. I share more about the usefulness of Scrivener here.
Now it was only a matter of writing the books, editing, getting a great book cover and hitting publish.
As I’ve continued to learn how to write better stories, I’ve discovered unique tips from bestselling authors.
In this post, I share what I’ve experimented with in Scrivener and what I’ve found to be super helpful to organize my Novels and my nonfiction books.
If you’re interested in going into more details about how to use Scrivener to write your stories and tips on self-publishing, you can find detailed videos, PDF’s and emails here: free mini-course The Storyteller’s Roadmap.

5 Ways to Organize Your Novel With Scrivener
I’ve been digging deeper into the unique ways to use Scrivener to write a book.
In the process I’ve been asking a lot of questions that I’m finding answers for.
Questions like: How can writers add the background of characters to a separate document? Where can writers put the details of plot, character arc and setting? What if writers want to add more detailed notes like: colours and symbolism or weather elements?
In this post you’ll find different ways for you to develop and organize your story with Scrivener.
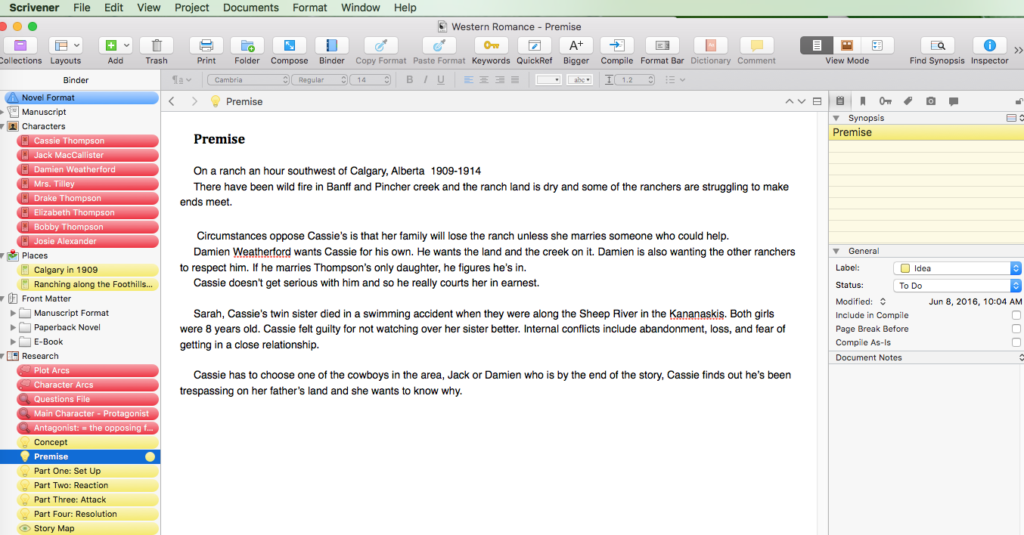
1. First before you write a word of your first draft, you can write out your story structure. Look under the Binder and move down until you see the Research folder. Here you can add a new page. You can see I’ve chosen yellow for plot ideas. Write your details of Concept, Premise, Part One, Part Two, Part Three and Part Four, in separate pages here.
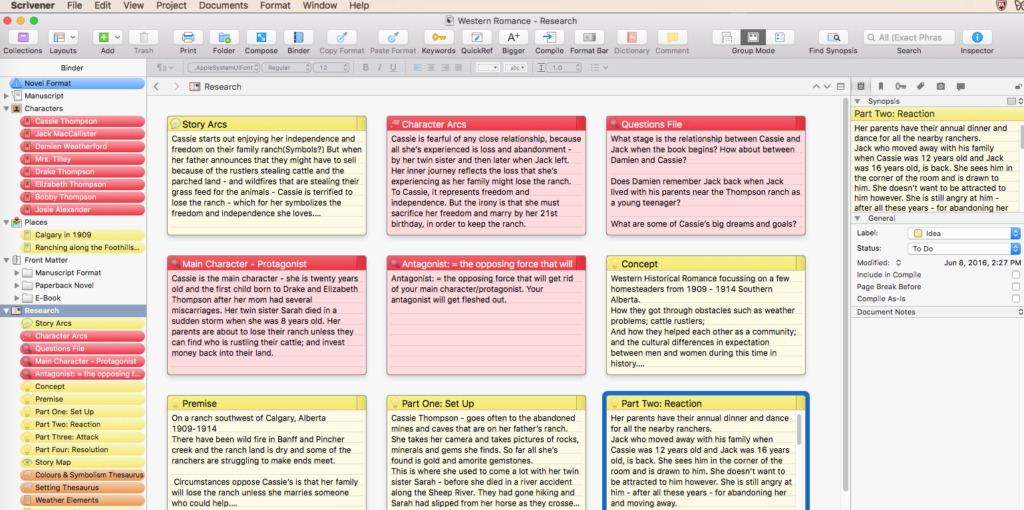
You can get a ‘bird’s eyeview’ by going to the top of the document where it says “Group Mode” and clicking on index cards.
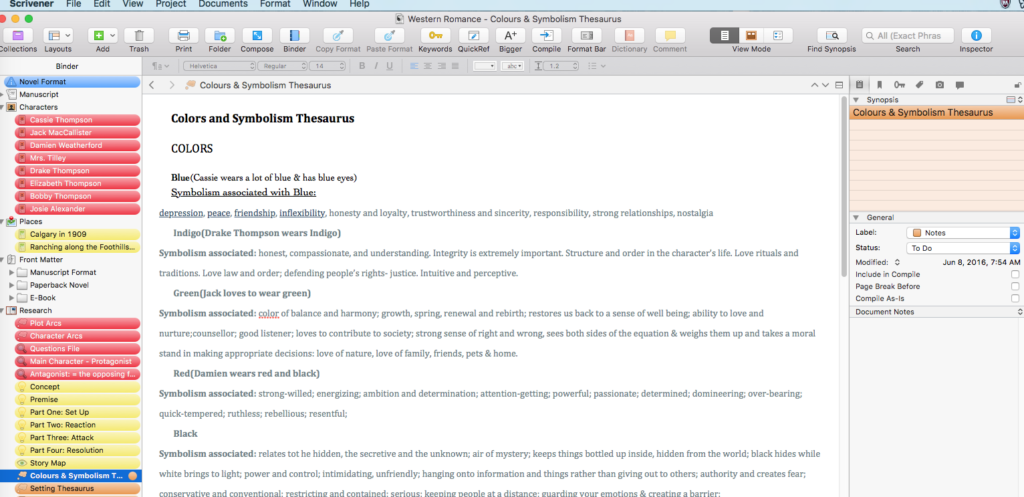
2. Next, if it’s helpful, create separate pages for colors and symbolism; for setting and weather elements. You can see I’ve added different colours to represent each character. I’ve changed each of the tabs for color and setting thesaurus, in brown.
For this story, The Marriage Bargain(working title), Cassie is blue with orange for creativity, loyalty, strong relationships and nostalgia. Jack is green and red for harmony, growth, passion, strong-willed and a strong sense of right and wrong. Damien is a mixture of red and black because of his quick temper, that he keeps things hidden, that he is rebellious and resentful.
When you’re writing the first draft, it helps to have these pages to refer to at a moment’s notice to help you dig deeper into character, meanings and story.
3. Under the folder that says “Places”(in yellow), you can add a photo and description of the area where your story takes place. As writers, it helps to get our descriptions accurate when we can see vivid pictures(when possible) of the time and place that we’re writing about.
A tip for finding photos. Go to Pinterest and start a separate board for each of your books. Then in the search bar, type in what you’re looking for. For this book I typed in ranching, 1900s, Alberta. You can seen the pictures I found for this Western Romance here.

If you click on “Places” folder, you’ll get to see all the pictures you’ve added at a glance.

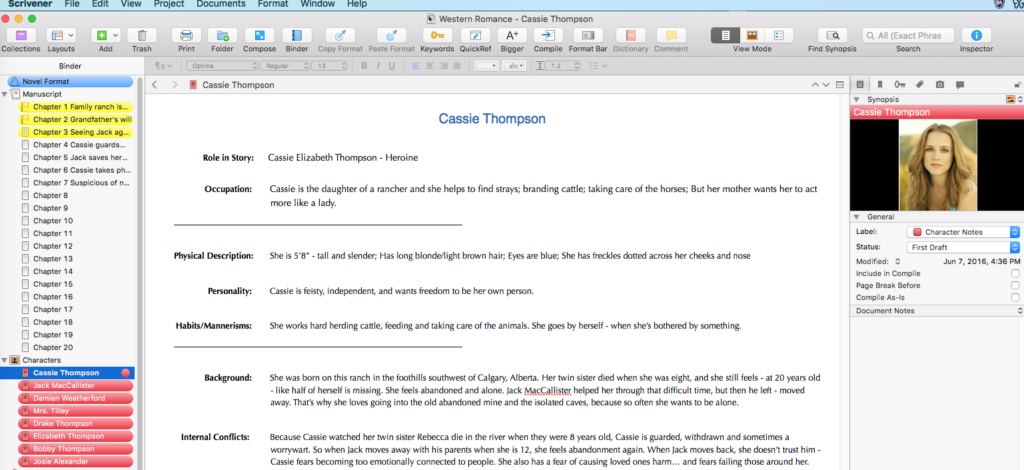
4. Then you can go to the “Characters” folder and add a new page for all of your main characters. It’s quite fun to find photos of your characters. It’s a little like directing the casting for your own movie 😉 I find pictures on Pinterest mostly, but sometimes on Creative Commons.
5. Lastly, you can go back to the “Manuscript” folder and begin to add one-liners for chapter titles. I don’t know about you, but I find it helpful to add short descriptive phrases to help guide me as I’m writing the first draft. For first draft, I use the color yellow, to remind me that I can just say it. In the final draft – as I’m editing for story flow I switch to green.
Oh, and by the way, if you go to the top of the scrivener page you’ll see the “Add” button(it’s the only green one), which is where you add a new page, whenever you need one.
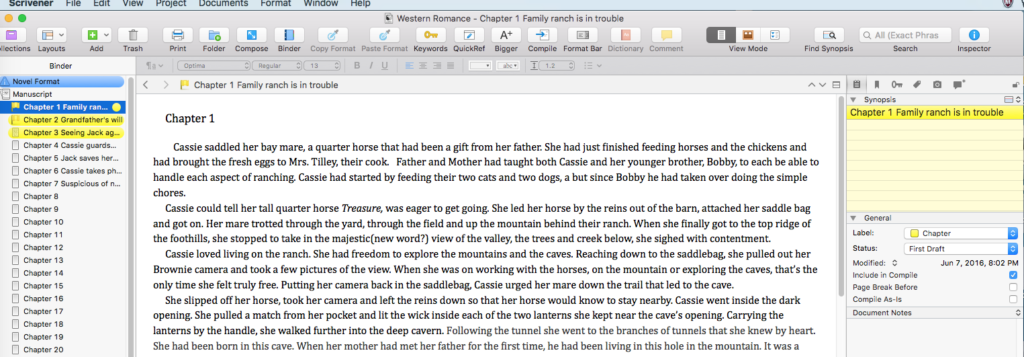
You can also see the “index card” version by clicking on the “Manuscript” folder.

I hope you’ve found this helpful as you write your novel. If you’re interested in going into greater detail about how to use Scrivener to write your stories and self-publish your books, you can find detailed videos, PDF’s and emails in this free mini-course The Storyteller’s Roadmap.
What do you find helpful when you are outlining and organizing your story? Please, leave a comment below so we can learn from each other 😉
