“Start where you are. Use what you have. Do what you can.” Arthur Ashe
As I’m working on rewrites for Book #2 in the Russia to Canada trilogy, I’ve revisited the process of publishing books from scratch.
So, I thought I’d write out the checklist I’m working on. My hope is that you’ll find this list helpful, especially if you’re working on your first book.

Here’s a list to remember as you self-publish your book.
1. When you’ve finished writing your manuscript, it’s time for rewrites and editing.
As I learned during the rewrites of Book #1 – it takes awhile to get your story figured out so it flows. It’s difficult and a little unnerving to rewrite your story. For my first book and now again with this manuscript, rewriting is a mixture of pain and wonder. The magic comes in when you get another chance to write the story you originally wanted.
A good idea after you’ve finished your rewrites, is to have someone edit your work. It’s really helpful if you can get a professional editor. However, if the cost is too steep for you, at the very least ask a few Beta readers to read through your story. I’ve found that beta readers and critique partners offer a world of great tips and advice. They will catch details that you miss in your manuscript. It’s something I’ve found that can make your story so much better.
When the final draft is finished…
You need to add extra pages – like the copyright page, table of contents, copyright page, dedication page, the Author’s note and anything else that’s important to you. It’s important to include a call to action at the end of the book for people to sign up for your email newsletter and include your social media links and your website here. That way readers that love you book can find where you are and where they can buy your next book.
Don’t forget to write your back of the book blurb – your description of your story. This is what readers look at after they see your book cover, to decide if your story is interesting enough for them to buy. This needs to be done before you self-publish.
It’s a good idea to use a proof-reader to read through your manuscript, so that someone who has never read your book before, can go through it one more time with a fine tooth comb, to see if there are any last minute typos or punctuation issues that need to be fixed before publishing.
2. Choose your cover design for ebook and print book
A great book cover for your ebook and print book, is what the reader sees first. It’s important to get this looking as good as possible. If you can afford it, the best option would be to get a professional designer. This can run you anywhere from $200 to over $1000. If you are on a tight budget, you could try the do-it-yourself option. A great option for this is diybookcovers.com with Derek Murphy. He also had an amazing post here on how to create your own FREE book covers using MS Word.
3. Get Your Website up and running
There are ways to get your website up and running for free when you’re first starting out. I started with a free blogger website, but a free WordPress.com site is easy to navigate and another great option.
At some point, especially if you want to write as a career, it would be a good idea to go with a self-hosted website. That’s what I use for this website – lornafaith.com. I use BlueHost.com for hosting, which I’ve found helpful and very affordable. When you’re using a self-hosted website, you’re also able to insert a signup form to an external list service like Aweber – which is what I use. If you want to start out by using a free wordpress.com website, you can host the form for people to sign up on the service itself(like Aweber) and provide a re-direct. It’s not the easiest way to do this, but it works for a new author just starting out.
4. Publish on Amazon, Kobo and other estores
If you’ve just published your first book and you don’t have an existing platform, it could be worth your while to go with Amazon’s KDP Select for the first 90 days. It will allow more people to download your book which will allow your book to get noticed by more people.
After the 90 days is up, you’ll want to publish on Kobo and on Smashwords – which is a distribution store that will get your book up on places like iBookstore, Barnes & Noble, Kobo, OverDrive, Flipkart, Indigo, Collins, Bookworld and many more.
In the beginning, when you first set up your profile, you’ll need to fill in the tax information. Non-US citizens will have 30% withholding tax applied unless you figure out your tax numbers. This is a great post from Catherine Ryan Howard and another post by Karen Inglis to help you sort that out.
Also remember to go to Author Central on Amazon and fill out your profile. This will help to get your books all linked together.
5. Get a Print Book Made
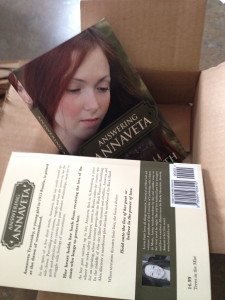
This is quite fun! I still remember holding my 1st book in my hands. I couldn’t believe I had written a book that had so many pages. The excitement of holding your first book in your hands, is enough reason right there to have a print book made of your book. Trust me, it feels so real when you can actually hold the physical copy in your hands!
Seeing the first books arrive on your doorsteps is so exciting!
I used Createspace.com to publish into print – with print on demand, and my friend Heather Morin and her team did the book cover design.
6. Choose How You Will Market Your Book
After you’ve written your book and published it in ebook and print format, you’ve still got one thing left to do. Get your book into readers hands.
Learning how to market your book is a bit of a learning curve, but something that is important for every author to learn. I’ve found these books helpful: Book Launch: How to Write, Market & Publish Your First Bestseller in Three Months or Less AND Use it to Start and Grow a Six Figure Business and How To Market A Book
. Reading through these guides will save you a bunch of time, from trying to figure it all out on your own.
Some steps that I’ve found helpful, which I hope you’ll find useful are:
- Set up your author profile on Amazon and add your book in different formats on Goodreads. Then, its a good idea to set up a print giveaway. You can do this on your blog or on You might be surprised at the new connections and readers you find there and the readers who review your book.
- Like I mentioned above, you could start out with some kind of FREE giveaway with KDP Select free 90 day period in order to ramp up your book in the Amazon algorithms.
- Choose something you like to do and do it once a day – or once a week. Like putting a picture of your book or something related to your book(research pics, a quote, etc.) up on Instagram or Pinterest for example.
This will help to get your book into the hands of more readers and will help to get your name out there as a new author.
7. Start to write the next book
Once you’ve done all of the above, the best thing you can do is write the next book. That’s really the best marketing for any author… is to continue to write books and improve your craft.
“So keep writing great books. Keep winning over one fan at a time. Keep improving your craft.” Hugh Howey
So that’s it. Those are the basic steps that I went through for my first book…. and a good reminder as I finish up the rewrites for Book #2.
What’s your checklist for publishing your book – would you add anything? I’d love to hear your thoughts in the comments.

